
How to clean car headlights restore clarity comes down to two things: removing surface grime safely, then deciding whether you need a light polish or a true oxidation removal step.
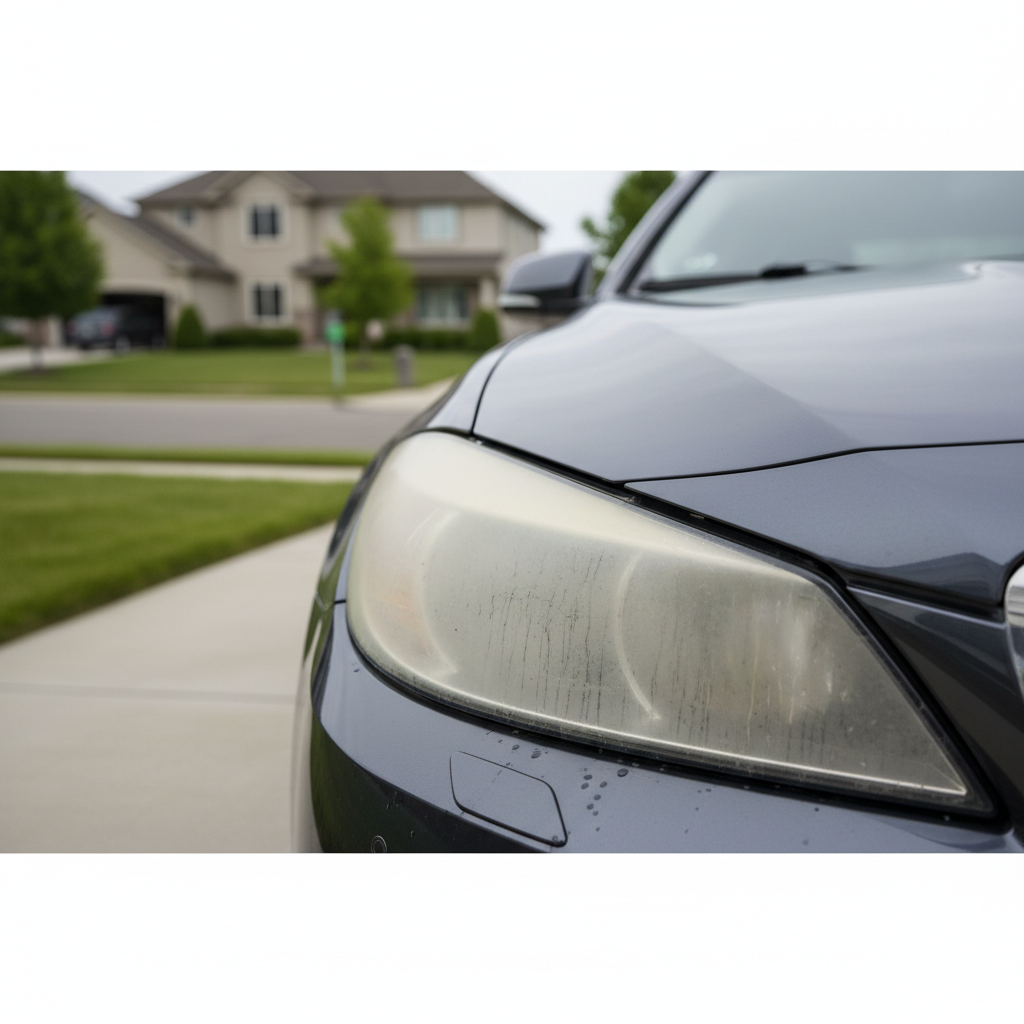
If your headlights look hazy, it’s not just cosmetic, it can reduce nighttime visibility and make the car look older than it is. The good news is most cloudiness starts on the outside lens, so you can often improve clarity at home without fancy equipment.
But there’s a catch many people miss: modern headlight lenses are usually polycarbonate plastic with a protective UV coating. Aggressive abrasives or the wrong chemicals can scratch, craze, or strip that coating, and the lens may haze up again faster.
In this guide, you’ll get a practical way to diagnose what you’re dealing with, pick a safe method, and finish with protection so the results last longer than a weekend.
Why headlights turn cloudy (and what “cloudy” actually means)
Headlights can look “dirty” for a few different reasons, and each calls for a different fix. Treat them all the same and you either waste time, or you risk damage.
- Road film and bugs: greasy buildup, insect residue, salt, and traffic grime, usually removable with proper washing.
- Oxidation on the outside: a chalky, yellow haze caused by UV exposure, this is the most common reason lenses lose clarity.
- Pitting and micro-scratches: sand and debris leave tiny impacts, cleaning helps a bit, polishing helps more, but deep pitting won’t fully “disappear.”
- Moisture inside the housing: fogging behind the lens, often a seal or vent issue, cleaning outside won’t solve it.
According to NHTSA (National Highway Traffic Safety Administration), clear visibility is a core safety factor for night driving, so anything that limits your light output deserves attention sooner rather than later.
Quick self-check: which situation are you in?
Before you grab a “restoration kit,” do a two-minute check. It saves money and helps you avoid over-sanding a lens that only needed a wash.
Simple tests you can do in your driveway
- Fingertip test: after washing, run a clean finger over the lens. If it feels rough or chalky, oxidation is likely.
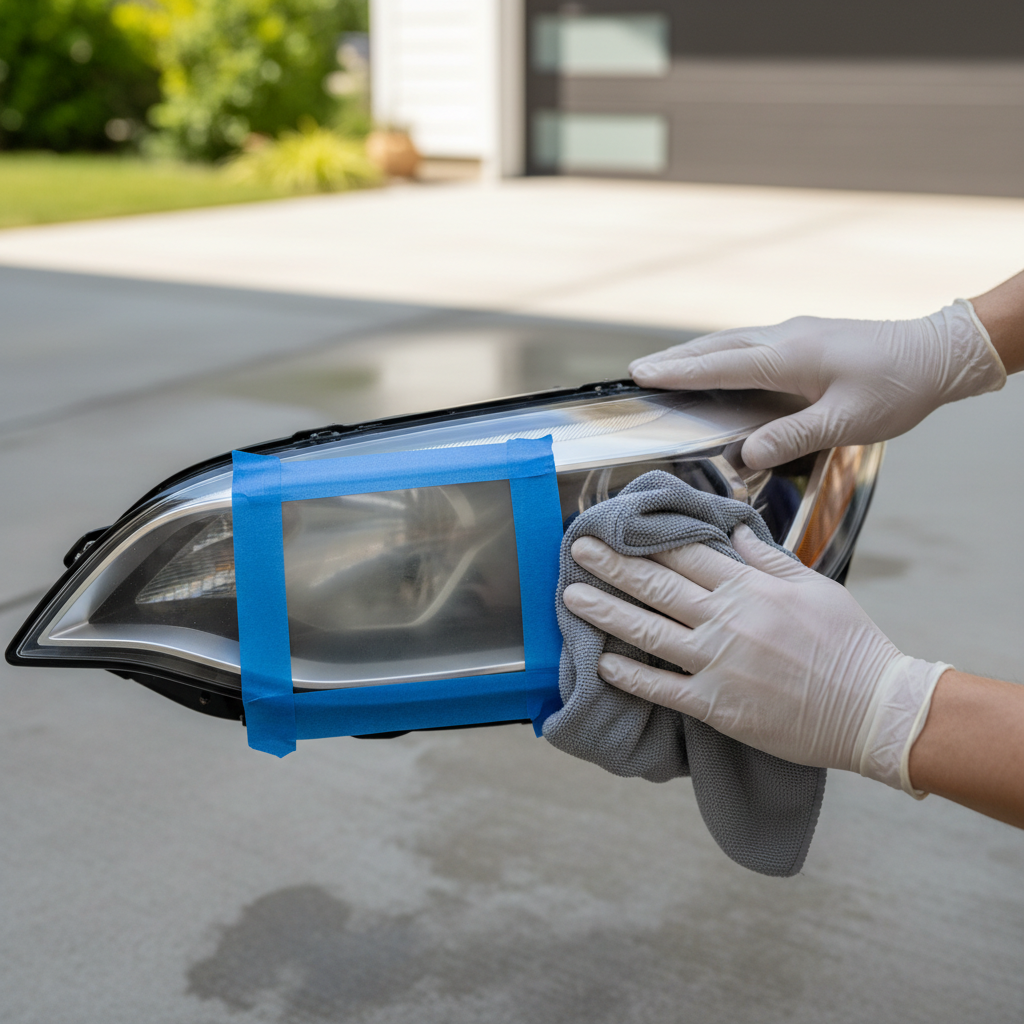
- Tape test: mask off a small square, then lightly polish that area with a headlight polish. If the square looks noticeably clearer, you’re dealing with outside haze.
- Inside fog check: if the haze looks “behind” the lens or you see droplets, the issue may be internal.
- Color clue: yellowing typically points to UV-related oxidation, while gray dullness can be micro-scratching plus grime.
Rule of thumb: if the lens is clear when wet but hazy when dry, oxidation is a strong suspect.
Choose a safe method: cleaning vs polishing vs restoring
Not every lens needs sanding. In many cases, a proper clean plus a mild polish is enough. Here’s a practical comparison.
| Situation | What you’ll see | Recommended approach | Risk level |
|---|---|---|---|
| Surface grime | Film, bugs, streaks | Wash + plastic-safe cleaner | Low |
| Light oxidation | Faint haze, slight yellow tint | Headlight polish + sealant | Low to medium |
| Moderate oxidation | Obvious cloudiness, dull beam | Restoration kit (fine sanding) + UV protectant | Medium |
| Heavy oxidation/pitting | Very yellow, rough, visibly worn | Multi-step sanding + protection, or professional refinish | Medium to high |
| Condensation inside | Fog/droplets behind lens | Diagnose seals/vents, repair housing | Varies |
If your main goal is how to clean car headlights restore clarity without damage, start with the least aggressive option and move up only if the lens still looks dull after drying.
Step-by-step: the safest DIY process that works for most cars
This is the “do no harm” workflow. It covers cleaning, light polishing, and protection, which is enough for a lot of daily drivers.
What you’ll need
- Car wash soap, water, and microfiber towels
- Painter’s tape (to protect paint and trim)
- Plastic-safe headlight polish or cleaner-polish
- Foam applicator pad or microfiber applicator
- UV protection (sealant, coating, or wipes designed for headlights)
1) Wash properly and prep the area
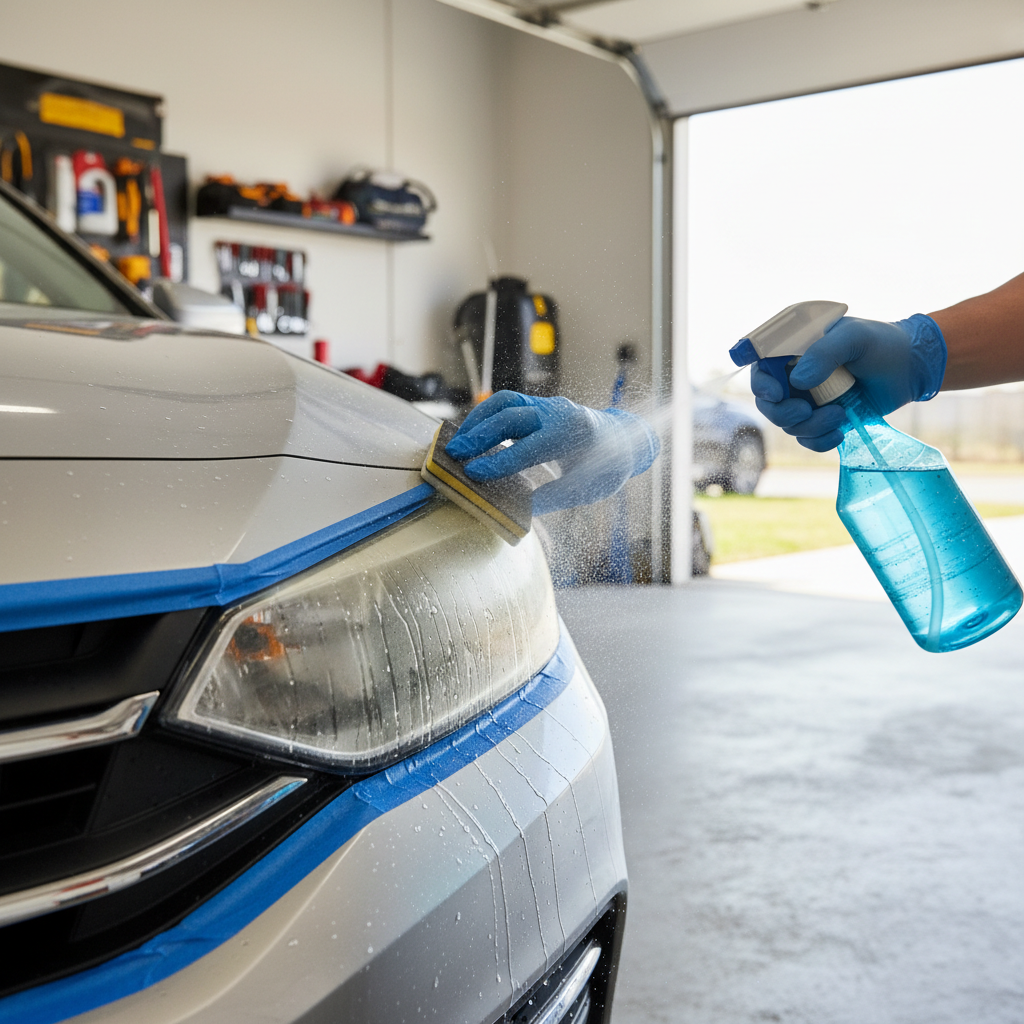
Wash the lens and the surrounding panel first, then dry. Tape the edges around the headlight so you don’t accidentally scuff paint or textured trim.
2) Clean the lens with a plastic-safe product
Use a dedicated plastic cleaner or a gentle APC diluted per label directions. Avoid harsh solvents because they can haze plastic in some cases.
3) Polish lightly, then inspect in full daylight
Apply a small amount of headlight polish, work it in with moderate pressure for 30–60 seconds, wipe clean, then step back. Repeating a couple rounds is usually safer than pushing hard in one pass.
4) Seal it, or it will haze again faster than you want
Polishing can remove oxidation but also leaves the surface more exposed. Apply a headlight-specific UV sealant or coating and let it cure per instructions.
Key point: If you stop at “clean and polish” but skip UV protection, you often get a short-lived improvement that fades after a few washes and sunny weeks.
When sanding is appropriate (and how to avoid common damage)
Sanding is the step that scares people, and honestly, that’s fair. It works well for moderate to heavy oxidation, but it’s also where most DIY damage happens: uneven pressure, skipping grits, or sanding dry.
If you use a restoration kit, keep these guardrails
- Use wet sanding only unless the kit specifically instructs otherwise, water reduces heat and helps prevent deep scratches.
- Follow the grit progression, skipping steps often leaves sanding marks that polish can’t hide.
- Sand evenly, keep strokes consistent, check your work often, don’t “dig” into corners.
- Stop if you see weird cracking patterns, crazing can happen if plastic gets stressed, at that point professional help may be safer.
- Always finish with UV protection, this is non-negotiable if you want durability.
According to 3M, headlight restoration systems are designed as a process, not a single product, so following the full sequence matters more than buying the “strongest” compound.
Common mistakes that ruin clarity or shorten results
Most disappointment comes from a few predictable missteps. If you’re trying to how to clean car headlights restore clarity and keep them that way, these are the ones to avoid.
- Household abrasives as a “hack”: toothpaste and aggressive powders can leave micro-scratches or inconsistent finish, sometimes it looks better at night but worse in sunlight.
- Using ammonia-based glass cleaner: some formulas can stress plastics over time, it may not fail immediately, but it’s a needless gamble.
- Skipping masking: one slip with a pad can scar trim or haze nearby paint.
- Over-polishing one spot: creates distortion, especially noticeable with LED projectors behind the lens.
- No UV topcoat: the lens may haze again quickly, and people assume the “method didn’t work,” when it’s a protection issue.
If your headlights are already peeling or flaking, that can be the old UV layer failing. In that case, a mild polish might look patchy, a full restoration or professional refinish usually gives a more uniform result.
When you should consider a professional (or replacement)
DIY is fine for most outside haze, but a few scenarios justify a shop visit. It’s not about skill, it’s about cost versus risk.
- Condensation inside the housing: you may need seal, vent, or housing repair, sometimes wiring inspection too.
- Deep pitting or cracks: sanding won’t rebuild missing material, and cracks can spread.
- Advanced driver-assistance sensors nearby: some vehicles have sensors or cameras close to lighting assemblies, it’s worth checking your manual or asking a technician.
- You need a long warranty on results: some shops offer a warranty on their coating, which can be worth it in hot-sun states.
According to AAA, if lighting performance is compromised, addressing it early can help reduce night-driving risk. If you’re unsure whether your lens damage is cosmetic or structural, a professional inspection is a reasonable next step.
Key takeaways (so you don’t overthink it)
- Start gentle: wash and inspect before jumping to sanding.
- Oxidation is usually the real culprit when the lens looks chalky or yellow.
- Protection matters: a UV sealant often decides whether the improvement lasts.
- Internal fogging is a different problem, it often needs housing or seal work.
Conclusion: clear headlights come from the right level of effort
Most people searching how to clean car headlights restore clarity don’t need extreme measures, they need a smarter sequence: clean well, polish only as much as needed, then lock in the work with UV protection. Pick the least aggressive method that gets you to clear, consistent light output, and don’t ignore signs that the haze sits inside the housing.
If you want a simple next step, wash and dry the lenses, do a quick tape test, then choose either a light polish plus sealant or a full kit process based on what you see.
FAQ
How often should I clean my headlights to keep them clear?
For most daily drivers, cleaning during regular washes is enough, with a sealant refresh every few months depending on sun exposure, parking outdoors, and product type.
Is it safe to use toothpaste to clean headlights?
It can give a temporary improvement, but results vary and it may leave fine scratches or uneven clarity, especially on softer plastics. A dedicated headlight polish is usually more predictable.
What’s the fastest way to restore clarity without sanding?
A cleaner-polish plus a UV sealant is often the fastest “safe” combo for light haze. If the lens stays chalky after polishing, sanding becomes more reasonable.
Why do my headlights look clear when wet but cloudy when dry?
That pattern commonly points to oxidation and micro-scratches on the outer surface. Water temporarily changes how light refracts, then the haze returns as it dries.
Do I need to remove the headlight assembly to restore it?
Usually no. Most restoration and protection steps work fine with the headlight on the car, as long as you mask edges carefully and keep products off paint and trim.
How long does headlight restoration last?
It depends on the UV protection step, climate, and whether the car lives outdoors. A proper UV coating generally lasts longer than “polish only,” but real-world durability varies by product and conditions.
What if the cloudiness is inside the headlight?
External polishing won’t fix internal condensation. You may need to check vents, seals, or cracks, and in some cases a technician can confirm whether repair or replacement makes more sense.
If you’re trying to improve night visibility quickly and you’d rather avoid trial-and-error, a reputable headlight restoration kit with a clear grit sequence and a dedicated UV topcoat is often the most straightforward route, and a local detail shop can be a good fallback when fogging or lens damage looks more serious.