How to install door edge guards on car comes down to three things people often skip, clean prep, correct measuring, and the right pressure and cure time, get those right and most “it won’t stick” headaches disappear.
If you park in tight garages, deal with windy parking lots, or have kids swinging doors open, edge guards can save paint and reduce chips along the door seam. They’re inexpensive, but the install quality decides whether they look factory-clean or start lifting within a week.
I’ll walk you through the main styles, what tools actually matter, a fast self-check to pick the right method, and a step-by-step install you can do in a driveway. I’ll also call out the common mistakes that waste a kit, because they’re surprisingly consistent.
Pick the right door edge guard (the install method changes)
Before you start, confirm what type you bought. The material and adhesive decide how forgiving the install will be and how long it can last.
- U-channel (pinch-on) trim: Usually PVC or rubber with metal clips inside, it grips the door edge without glue. Quick install, but thickness varies and cheap versions can look bulky.
- Adhesive-backed strip: Thin and clean-looking, often clear or color-matched. Prep matters a lot, poor cleaning leads to lifting.
- 3M-style tape edge guards: Similar to adhesive-backed, but with known-quality acrylic foam tape. Typically better hold, still needs good surface prep.
- Door edge film: Clear paint-protection film for the edge zone, not a “trim.” Great for minimal look, but alignment takes patience.
Many kits call themselves “universal,” but door edges vary by thickness and curvature. If your doors have a thick folded seam or sharp bend near the top, a pinch-on guard often fits better than rigid adhesive strips.
Tools and materials you’ll actually use
You don’t need a full detailing cabinet. You do need the right cleaning supplies and a way to cut cleanly.
- Isopropyl alcohol (IPA) and a microfiber towel for final wipe
- Mild car wash soap and water for the first clean
- Masking tape or painter’s tape for marking endpoints
- Measuring tape or a flexible ruler
- Sharp scissors or a utility knife (new blade helps)
- Plastic squeegee or your thumb wrapped in microfiber (for adhesive styles)
- Optional: Heat gun or hair dryer on low for cold weather installs
According to 3M, pressure and surface preparation strongly influence pressure-sensitive adhesive performance, meaning the tape can be “good,” but your results still fail if the surface has wax, dust, or moisture.
Quick self-check: is your car ready for install today?
This is the part that saves time. If you answer “yes” to a few of these, adjust your plan before you peel any liner.
- Just waxed or ceramic-coated recently: Adhesives may not bond well; you may need extra prep or a different product.
- Temperature below about 60°F: Many adhesives become less compliant; plan to warm the panel and the strip.
- Door edge has existing chips or rust: A guard can hide it, but it can also trap moisture; consider touching up paint first.
- Edge has complex curves: Pinch-on is more forgiving; rigid strips can wrinkle or lift at bends.
- You wash with strong degreasers: Some plastics discolor faster; choose a reputable brand and avoid harsh chemicals around the trim.
If you’re mainly protecting against door dings in parking lots, placing guards on the front edge of rear doors and the rear edge of front doors often makes the most practical difference.
Step-by-step: how to install door edge guards on car (adhesive-backed)
This method applies to clear/color-matched adhesive strips and many tape-based kits.
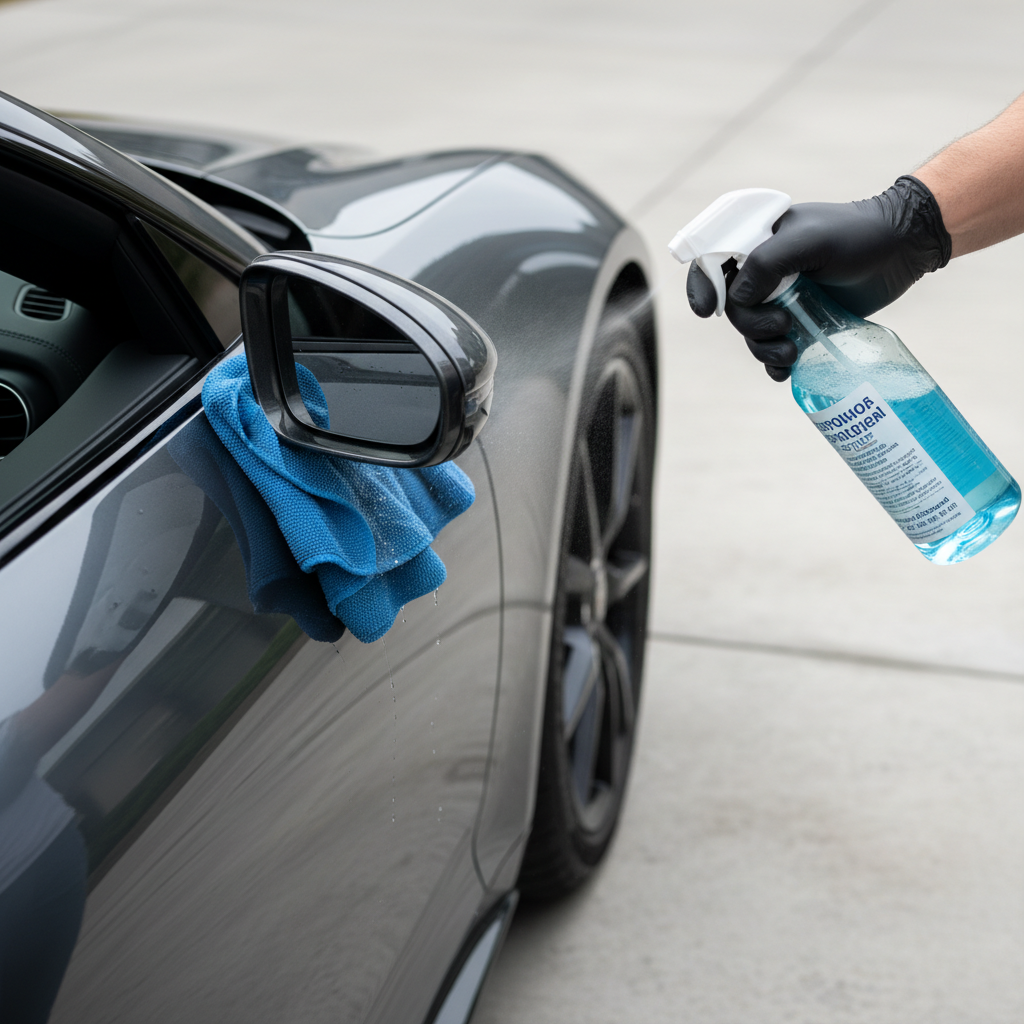
1) Wash, then do a final alcohol wipe
Wash the door edge area with soap and water, dry it, then wipe the exact bonding zone with IPA. Don’t touch the cleaned edge afterward, skin oils can reduce adhesion.
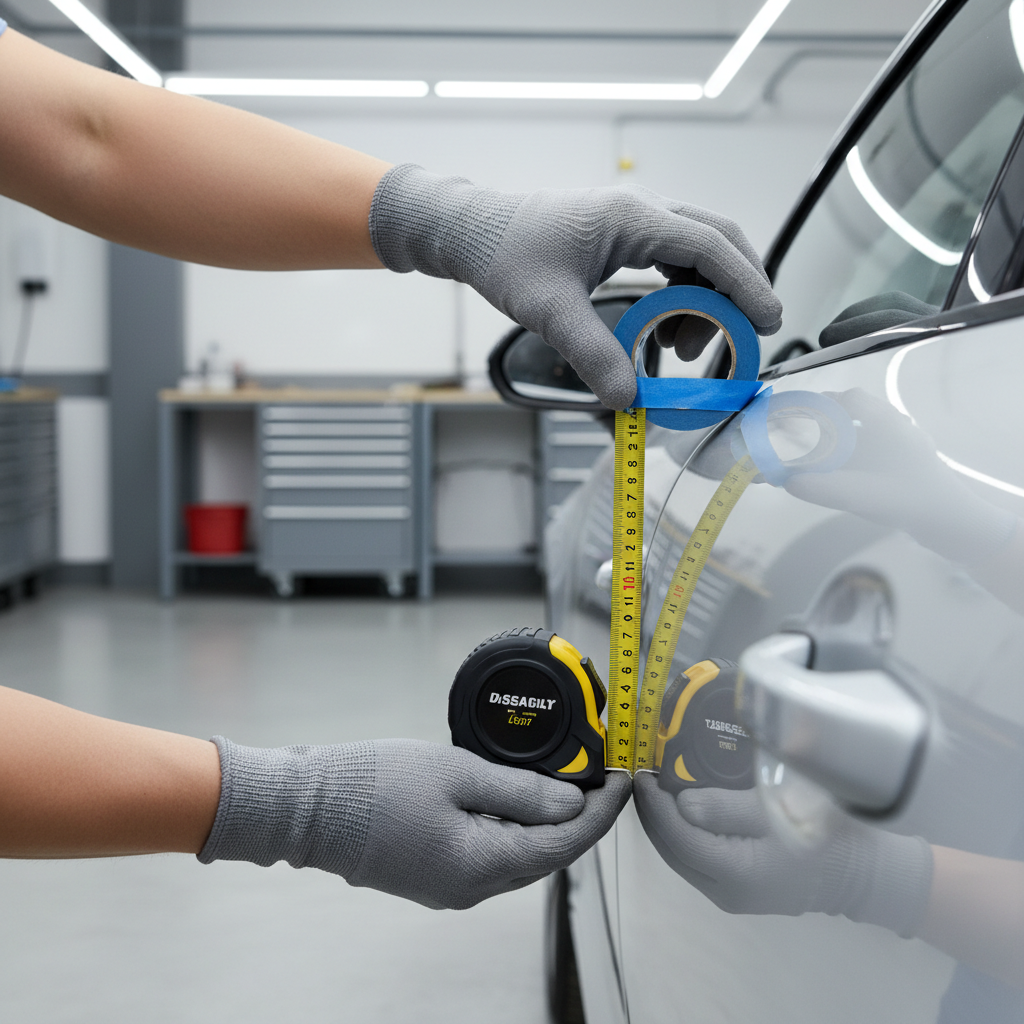
2) Measure once, then mark endpoints
Open the door fully and decide where you want the guard to start and stop. Use painter’s tape to mark the top and bottom endpoints so you don’t “walk” the strip up or down while sticking.
3) Test fit the strip before peeling
Hold the strip in place along the edge, check how it behaves around curves, and confirm it won’t interfere with weather seals. If it wants to spring back at the top corner, plan to warm that area slightly.
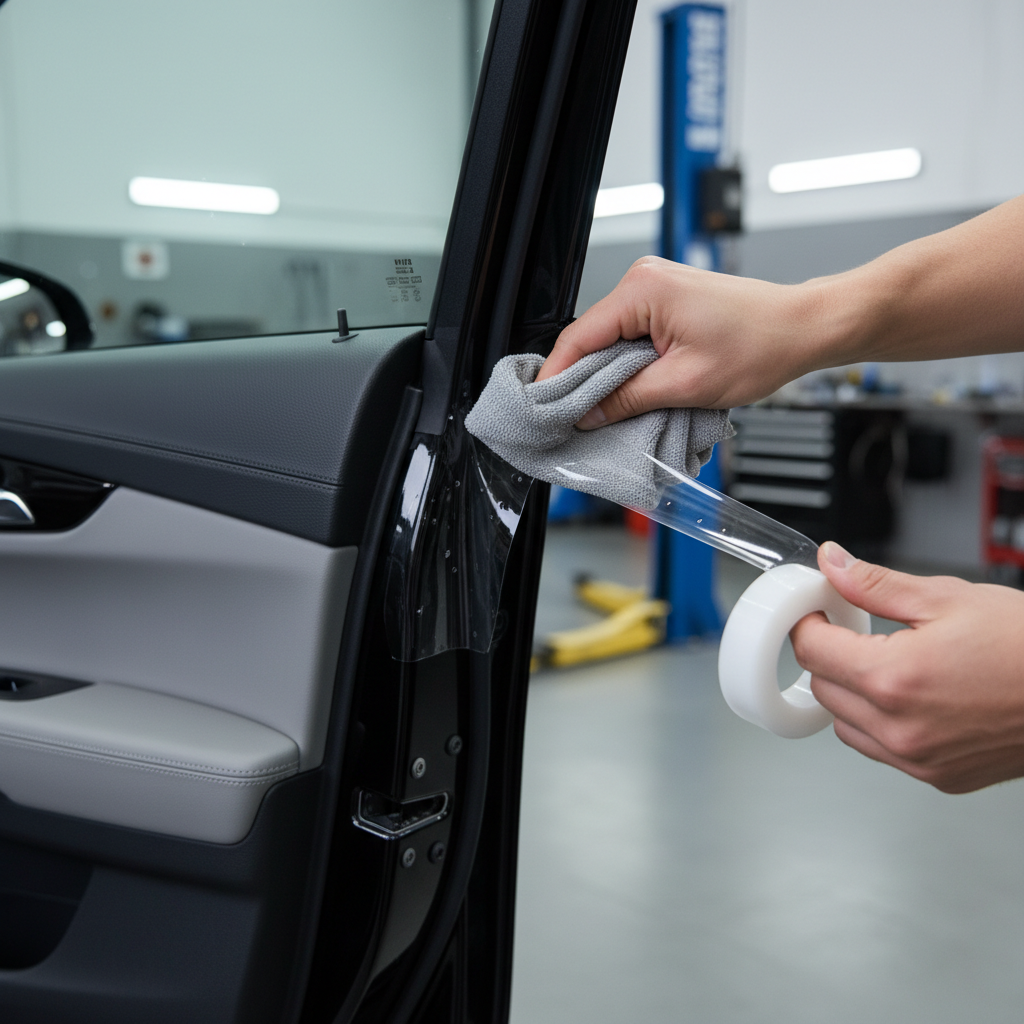
4) Apply gradually, don’t commit the full length at once
Peel a few inches of liner, align to your top mark, then press and continue down in short sections. Keep the strip centered on the edge, avoid “rolling” it onto one side, which can look uneven and lift later.
5) Press firmly and evenly
Use your thumb wrapped in microfiber or a small squeegee to apply steady pressure along the full length, especially at corners. This is where many installs fail, it looks done, but the adhesive never fully wets out against the paint.
6) Let it cure before washing
Most pressure-sensitive tapes need time to build bond strength. If the kit doesn’t specify, waiting at least 24 hours before a wash is a safer habit, longer can help in cold or humid conditions.
Key point: If you have to reposition, do it immediately. After you press it down hard, pulling it back up can stretch the strip or contaminate the adhesive.
Step-by-step: pinch-on (U-channel) edge guards
Pinch-on guards are more about clean seating than adhesive bonding. They can still look messy if you rush the corners.
1) Clean the edge anyway
Even without glue, grit under the trim can scratch paint over time. Clean, dry, and remove any stuck-on dirt along the seam.
2) Start at the top and seat the channel fully
Push the channel onto the edge, then work downward. Use firm, even pressure, you want the internal clips to grip the folded seam.
3) Handle curves carefully
At tight bends, compress the guard slightly on the inside of the curve. Some kits include a small tool, but your fingers usually work fine if you go slowly.
4) Cut clean and finish the end
Cut square for a cleaner look. If the kit includes end caps, use them; if not, ensure the cut end sits flat and doesn’t flare outward.
If your guard keeps walking off near the bottom, your door edge may be thinner than the channel expects, swapping to a smaller profile often beats adding glue.
Common mistakes that cause peeling, gaps, or an “aftermarket” look
- Installing over wax, sealant, or road film: Adhesives bond to contamination, not paint, and they lose the fight.
- Trying to stretch the strip around a corner: Stretching creates tension that pulls it back later, especially in heat.
- Skipping pressure: A light pat isn’t enough; you need consistent force along the whole length.
- Installing in cold wind: Tape stiffens, moisture sneaks in, and edges lift first.
- Covering drainage gaps or interfering with weather stripping: On some cars, the door edge area interacts with seals; if the door feels “hard to close,” rethink placement.
One more reality check, some clear guards look great on day one but turn cloudy after months of sun and repeated washes. Product quality matters, and so does how aggressive your chemicals are.
Which option fits your situation? (quick comparison table)
Use this table to choose based on your priorities, not just price.
| Type | Best for | Main risk | DIY difficulty |
|---|---|---|---|
| Adhesive-backed strip | Low-profile look, color match | Peeling if prep is weak | Medium |
| 3M tape-style guard | Stronger hold, cleaner edges | Harder to reposition cleanly | Medium |
| U-channel pinch-on | Quick install, curved edges | Bulkier look, fit varies | Easy |
| Edge film (PPF) | Nearly invisible protection | Alignment and bubbles | Medium-Hard |
When it’s worth getting professional help
Most people can handle door edge guards, but a shop can be the better call in a few scenarios.
- Fresh paintwork: You may want guidance on safe adhesion timing so you don’t trap solvents or mark soft clear coat.
- Rust or bubbling paint on the edge: Covering it can trap moisture, a body shop can advise whether repair comes first.
- High-end PPF edge film: If you care about a nearly invisible finish, pros usually get cleaner alignment on the first try.
If your door doesn’t close smoothly after install, remove the guard and reassess placement. Forcing a door shut can damage seals, and if you’re unsure, a detailer or body shop can take a quick look.
Conclusion: a clean install is mostly prep and patience
If you remember one thing, treat the edge like a paint-prep step, not a sticker step, clean, dry, align, then press like you mean it. That’s the difference between a guard that blends in and one that starts lifting at the corners.
Your next move can be simple, pick the guard style that matches your door edge shape, then set aside 30–60 minutes in decent weather. If you’re still deciding, start with one door as a test before committing to all four.
FAQ
- Can I install door edge guards on a wet car?
It’s not a good idea. Moisture can sit under adhesive or inside a pinch-on channel, which can lead to poor bonding or trapped grime, dry the edge fully first. - How long should I wait to wash my car after installing edge guards?
Many kits do best with at least 24 hours of dry time. In cooler weather, giving it longer can help the adhesive build strength. - Do door edge guards damage paint when removed?
Usually they come off cleanly, but results vary by adhesive quality and how long it stayed on. Gentle heat and slow peeling reduce risk, and adhesive remover can help with residue. - Why is my door edge guard peeling at the top corner?
Top corners see more tension and weather exposure. It often comes from stretching the strip around the bend, weak pressure, or installing when the tape was too cold. - Should I choose clear or color-matched guards?
Clear looks subtle on most colors but can yellow or haze over time depending on quality and sun exposure. Color-matched can hide wear better, but fit and finish vary by brand. - Can I put edge guards over existing chips?
You can, but it may trap moisture or hide rust starting underneath. Touch-up paint and proper drying time is a safer approach if you already see exposed metal. - What’s the easiest way to cut door edge guard neatly?
Use sharp scissors for soft trim and a fresh utility blade for firmer material, then cut square. A clean cut end looks more factory and resists peeling.
If you’re installing guards on a newer car and you want the finish to look close to factory, it can help to choose a higher-quality adhesive kit and do one door as a “process check” before you repeat the steps on the rest.