How to remove car decals without damaging paint comes down to two things, softening the adhesive gently and using the right tools so you never “dig” into the clear coat.
If you have a stubborn bumper sticker, old vinyl lettering, or a dealership logo you want gone, it’s tempting to grab a razor blade and rush it. That’s where people end up with scratches, hazy clear coat, or a patch of paint that looks dull compared with the surrounding area.
This guide breaks down what to do for newer decals versus sun-baked ones, what products typically work without drama, and how to avoid the “ghost outline” that sometimes shows up after removal. You’ll also get a quick decision checklist and a practical table for picking the safest method.
What usually causes paint damage during decal removal
Most paint problems are less about the decal and more about the removal approach. A few common failure points show up again and again.
- Using a metal blade on clear coat, even “carefully,” often leaves micro-scratches that become obvious in sunlight.
- Too much heat in one spot, especially with a heat gun, can soften clear coat or discolor trim, and the risk increases on repainted panels.
- Wrong solvent choice, some strong solvents can haze clear coat, stain plastic, or weaken fresh paint.
- Pulling the decal straight up instead of low-and-slow, which increases the chance of lifting weak paint or leaving more adhesive behind.
- Skipping the clean-up and protection step, leaving adhesive residue that collects dirt and encourages aggressive scrubbing later.
According to the U.S. Environmental Protection Agency (EPA), many chemical products used for cleaning and detailing can release volatile organic compounds, so it’s smart to use them with ventilation and follow the label, even if you’re only doing a small spot.
Quick self-check: what kind of decal and paint situation are you dealing with?
Before you start, figure out what you’re removing, it changes the safest plan.
- Decal type: thin vinyl graphics, thick bumper sticker paper, reflective vinyl, or a hard plastic emblem with foam tape.
- Age and exposure: months old vs. years in direct sun, sun-baked adhesive behaves differently.
- Paint condition: factory paint, repainted panel, oxidized/neglected clear coat, or any peeling edges.
- Surface: painted metal vs. painted plastic bumper, and avoid treating textured plastic the same way.
- Temperature: cold weather removal often turns into a mess, a warmer panel is easier and safer.
If the paint already looks cracked, chalky, or flaking, the “no damage” promise gets harder in real life, you may still remove the decal, but the panel may need paint correction or refinishing afterward.
Best methods compared (choose the safest match)
If you’re searching how to remove car decals without damaging paint, this table is the quick “pick your path” view. In many cases, mild heat plus a plastic tool is the most forgiving combo.
| Method | Best for | Main risk | What to use |
|---|---|---|---|
| Warm heat + peel | Most vinyl decals, newer stickers | Overheating one spot | Hair dryer or heat gun on low, microfiber |
| Plastic razor / scraper | Edge-lifting, thick sticker layers | Hazing from aggressive pressure | Plastic razor blades, soapy water |
| Adhesive remover | Leftover glue, tar-like residue | Trim staining, clear coat haze if misused | Automotive adhesive remover, microfiber |
| Eraser wheel | Badge tape residue, commercial vinyl remnants | Burning paint if used wrong | 3M-style rubber wheel, drill, light pressure |
| Steam | Delicate paint, cold climates, large decals | Water intrusion at edges | Hand steamer, towels |
When in doubt, start gentle and scale up. The opposite direction usually costs more.
Step-by-step: remove vinyl decals without harming clear coat
How to remove car decals without damaging paint is easiest when you treat it like detailing, prep, soften, lift, then clean and protect. Here’s a reliable workflow.
1) Wash the area and dry it fully
Wash around the decal with car shampoo and water, then dry. Any grit trapped under your fingers or towel turns into sandpaper once you start rubbing adhesive.
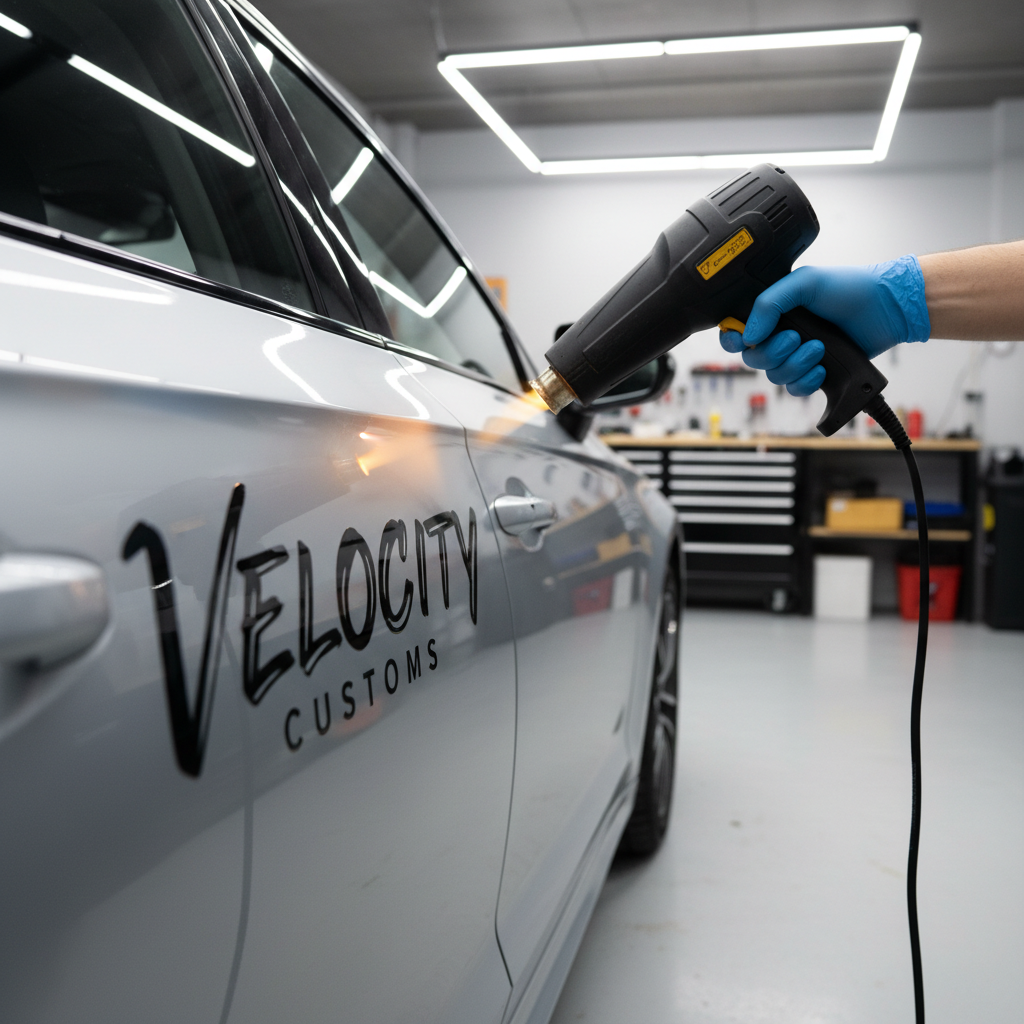
2) Warm the decal (gentle heat, constant motion)
Use a hair dryer for most cars. A heat gun can work on low, but keep it moving and stay several inches away. Your goal is “warm and pliable,” not hot.

3) Lift an edge and peel low-and-slow
Use your fingernail or a plastic razor blade to start an edge. Then pull the decal back over itself at a low angle, not straight up. If it tears, re-warm and continue in smaller sections.
- Good sign: adhesive stays soft and comes up with the vinyl.
- Bad sign: decal snaps or leaves a dry, patchy glue layer, add more warmth and slow down.
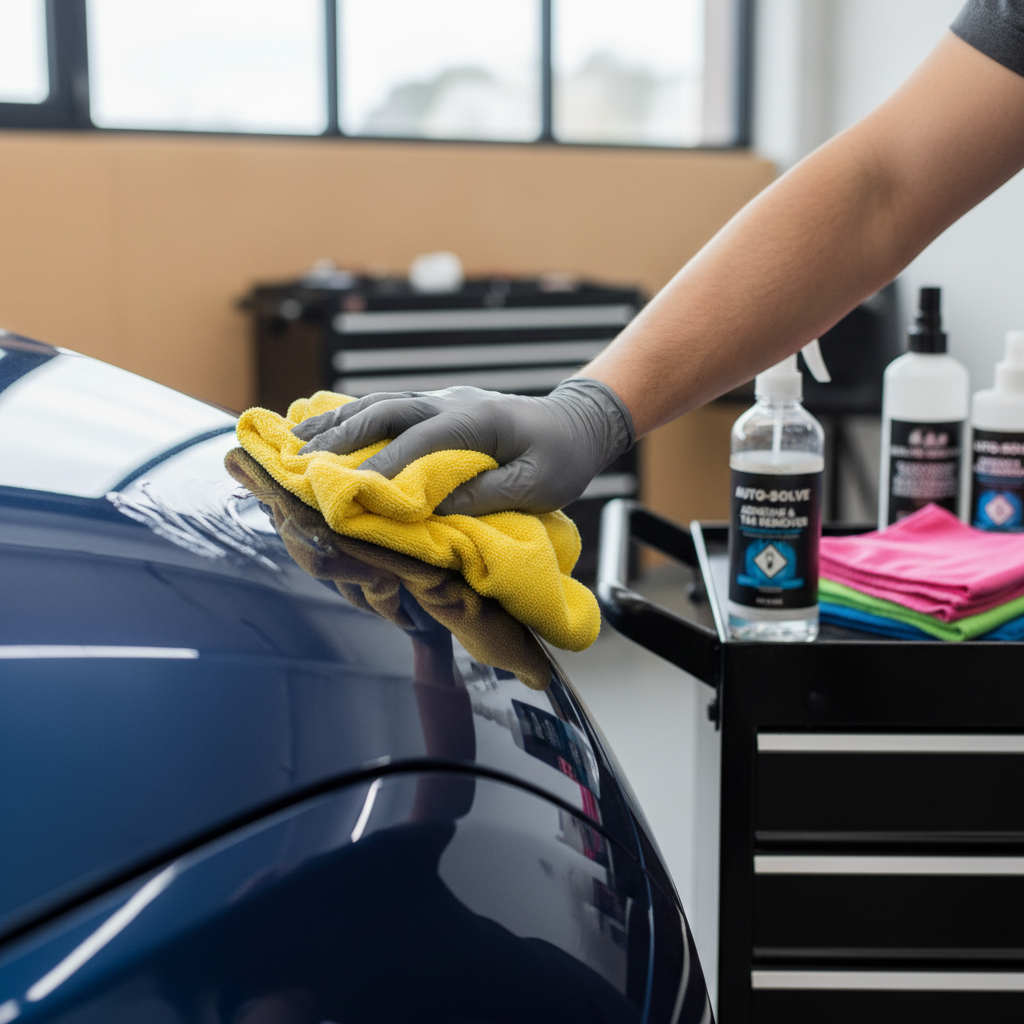
4) Remove leftover adhesive the “wipe, don’t scrub” way
Apply an automotive adhesive remover to a microfiber towel, then dab and wipe. Let the product dwell briefly if the label allows it, many adhesives release with patience, not pressure.
Test any chemical on an inconspicuous spot first, especially on repainted panels or older single-stage paint. If you see color transfer onto the towel or the surface turns dull, stop and switch to a milder product.
5) Final clean and protection
Once the residue is gone, wash or wipe the area again, then apply wax, sealant, or a ceramic spray to restore protection. The spot under a decal sometimes looks “newer” because it avoided UV, protection helps blend the finish over time.
Dealing with common problems: residue, ghosting, and brittle decals
This is where most DIY attempts get frustrating. A few targeted moves usually solve it without escalating to risky tools.
Stubborn glue that smears
- Warm the panel slightly, then try the remover again, many adhesives soften with mild heat.
- Switch to a fresh microfiber section often, smeared glue just gets redistributed.
- A clay bar can help on light residue, but use lubrication and minimal pressure to avoid marring.
“Ghost outline” after decal removal
Ghosting is often paint that faded around the decal from UV, leaving the protected area darker. You can’t always wipe that away. Light polishing may reduce the contrast, but aggressive compounding can thin clear coat, so go conservative.
If the outline is sharp and the car is older, a detailer can usually tell you quickly whether paint correction will help or if it’s a long-term UV mismatch you simply live with until the panel is refinished.
Decal breaks into tiny pieces
That usually means age and sun damage. Work smaller, keep the vinyl warm, and use a plastic blade only to guide the edge. Ripping faster rarely saves time, it just creates more adhesive cleanup.
Key do’s and don’ts (what experienced detailers tend to avoid)
- Do work in shade or a cool garage, hot panels make solvents flash off and heat control tricky.
- Do start with a hair dryer before jumping to a heat gun.
- Do use plastic tools and clean microfiber towels, dirty towels cause swirl marks.
- Don’t use metal razor blades on painted panels, even if you’ve seen it online.
- Don’t soak edges near window seals or fresh paint with chemicals, seepage can stain or soften materials.
- Don’t chase perfection with heavy compounding unless you understand clear coat limits, it’s easy to overdo.
According to the National Highway Traffic Safety Administration (NHTSA), maintaining clear visibility is part of safe driving, so if you remove decals from windows, make sure you don’t leave hazy adhesive that could create glare at night.
When it’s worth getting professional help
You can usually handle small decals at home, but a few situations justify calling a detailer or body shop, mainly to avoid turning a cosmetic job into a paint job.
- Repainted panels with unknown curing time or questionable prep, adhesive can pull weak clear coat.
- Large commercial wraps or many small vinyl pieces, labor and risk rise fast.
- Paint already failing, peeling clear coat, cracking, or heavy oxidation.
- Hard plastic emblems with foam tape that needs an eraser wheel and technique to avoid burn-through.
If you’re unsure, ask a pro to do a small test section, many shops can tell you in minutes what the paint will tolerate.
Practical finish: a simple plan you can follow today
If your goal is clean removal with minimal risk, keep it boring, wash, warm, peel low, dissolve residue, then protect. That’s the path most people take when they want how to remove car decals without damaging paint to be a one-and-done job, not a weekend of touch-ups.
- Action step 1: Start with a hair dryer, plastic blade, and a labeled automotive adhesive remover.
- Action step 2: If ghosting remains, try a light polish by hand, then stop before you chase it too far.
FAQ
What is the safest way to remove a decal from car paint at home?
Gentle heat from a hair dryer plus a slow, low-angle peel is usually the safest baseline, then use an automotive adhesive remover on a microfiber towel for residue.
Will Goo Gone damage car paint?
Some people use it successfully, but formulas vary and results depend on paint condition and dwell time. Test a small hidden spot first, and avoid letting it sit on plastics or rubber trim.
Can I use a razor blade to remove decals if I’m careful?
On paint, a metal razor is a common way to create scratches that only show up in sun later. A plastic razor blade is a safer alternative for edge-lifting and stubborn layers.
How do I remove decal adhesive without scratching?
Use a chemical adhesive remover and “wipe, don’t scrub,” switching to clean towel sections often. If you need more bite, add mild heat rather than pressure.
Why does the paint look different after I remove a sticker?
Often it’s UV fade around the decal, not leftover glue. A light polish can reduce the contrast, but some outlines are essentially sun mismatch and may not fully disappear.
Is a heat gun safe on car paint?
It can be, but it’s easier to overheat a panel, especially on edges and repainted areas. Many DIY jobs are safer with a hair dryer unless the decal is extremely stubborn.
How long should I wait to remove decals from fresh paint?
It depends on paint type and curing conditions, so it’s worth asking the body shop that sprayed it. Removing adhesive too early can mark or lift the finish.
What about removing decals from a plastic bumper?
Plastic bumpers usually tolerate the same approach, but they can heat unevenly and some solvents can stain textured trim. Lower heat and careful product choice matter more there.
If you’re dealing with old, sun-baked graphics or you want a cleaner finish without trial-and-error, a local detailer can often remove decals and polish the area in one visit, and you can still use the steps above to know what “safe” should look like.