how to apply paint protection film on car at home comes down to two things most DIY installs miss: obsessive surface prep and controlled, patient squeegee work, not “stronger” adhesive or more heat.
If you want the look and protection without paying a shop, a home install can be totally doable on flat or gently curved panels, think hood, roof, door cups, rocker areas. Where people get burned is jumping straight into laying film on paint that still has embedded grit, or trying to wrap complex bumpers on a windy driveway.
This guide is written for the real-world version of DIY: you want good results, you also want to avoid lifting edges, trapped bubbles, and the classic “it looked fine until the next day” failure. I’ll show you how to judge if your car and your workspace are ready, what to buy, and a repeatable install flow you can use panel by panel.
Before you start: what PPF can and can’t do
Paint protection film is a thick, clear urethane layer that takes the hit from sand, light scuffs, and bug acids so your clear coat doesn’t have to. It’s not magic, and it won’t erase existing paint issues.
- PPF won’t hide defects. Swirls, etching, and rock chips can show through, and some can look worse under film because the surface becomes more “optically obvious.”
- It’s great at prevention. On daily drivers, the biggest payoff is fewer chips on the hood and less peppering on rocker panels.
- Edges matter. DIY installs usually fail at edges: contamination under the edge, too much stretch, or not enough slip solution control.
According to International Detailing Association (IDA)... proper decontamination and controlled application conditions are foundational to quality paint protection work, which lines up with what most experienced installers will tell you when you ask where DIY goes wrong.
Workspace and timing: set yourself up for fewer bubbles
Many “bad film” complaints are really “bad conditions.” You want calm air, moderate temperature, and time to slow down.
- Indoor space beats outdoors. A garage with the door mostly closed helps reduce dust landing on adhesive.
- Temperature: many films behave best in mild temps, often around the upper 60s to mid-70s °F. Too cold can make film stiff, too hot can make it grabby and harder to reposition.
- Lighting: bright, angled lighting helps you spot silvering, trapped water, and tiny debris before it becomes permanent.
- Block time: for your first panel, assume it will take longer than you think, rushing causes creases and lifted corners.
If you’re attempting how to apply paint protection film on car in a shared space, do a quick “dust audit” first, wipe a black panel with a microfiber and see how much airborne stuff shows up after 5 minutes.
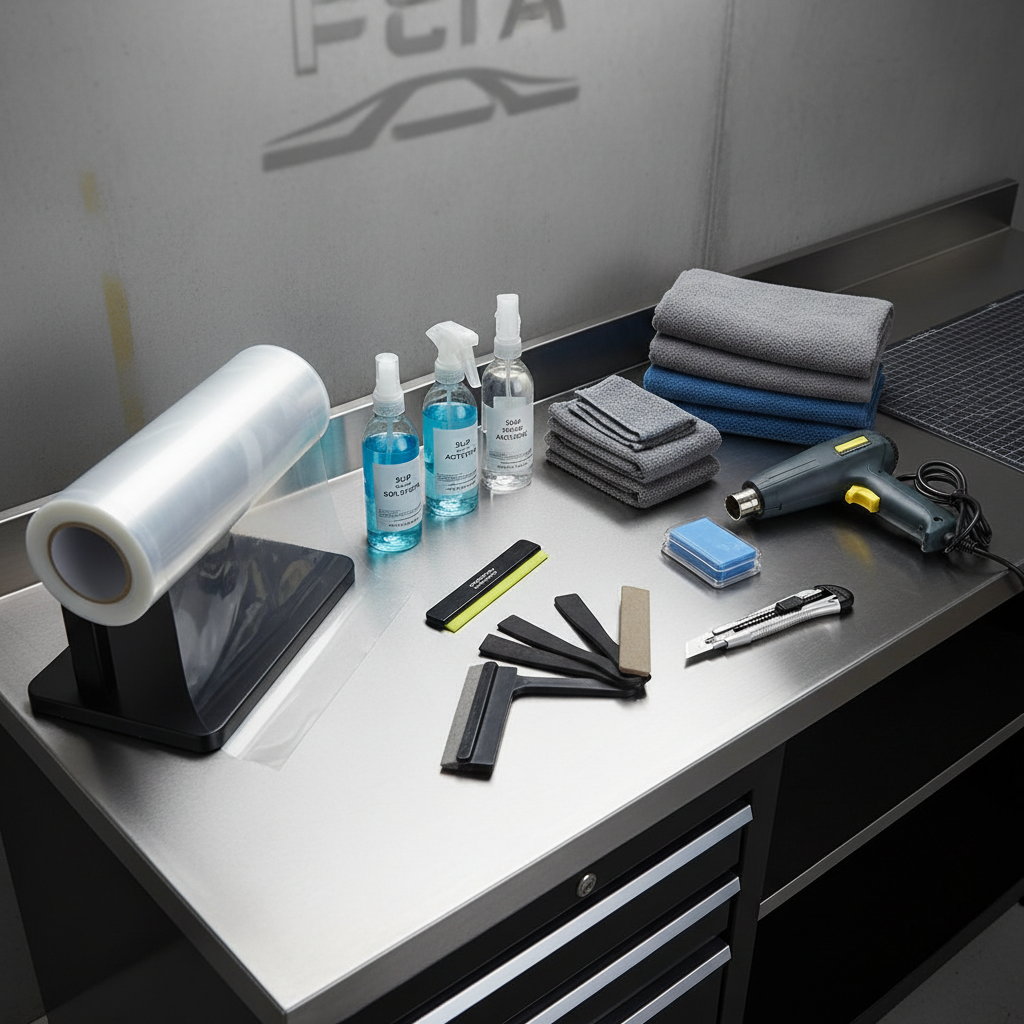
Tools and materials you actually need (and what’s optional)
You can install PPF with a minimal kit, but a few items make the difference between “acceptable” and “clean.”
Core kit
- Precut kit or bulk film: Precut reduces knife risk, bulk requires trimming skill.
- Two spray bottles: one for slip solution, one for tack solution.
- Squeegee(s): a main squeegee plus a smaller “detail” one for tight areas.
- Microfiber towels: lint-free, plenty of them.
- Clay bar or synthetic clay: for decontamination after washing.
- Isopropyl alcohol (IPA) mix: for final wipe and edge prep.
Nice to have
- Heat gun or steamer: helps set edges and relax light fingers, use carefully.
- Magnets or positioning tabs: helpful on larger pieces like hoods.
- Knifeless tape: safer trimming line on painted surfaces.
Blade trimming is where DIY can turn expensive fast, if you’re not confident, stick with precut patterns and simpler panels.
Prep work that makes or breaks the install
how to apply paint protection film on car successfully is mostly prep. If you only have patience for one part, make it this part.
- Wash thoroughly using a pH-balanced car shampoo, then rinse well.
- Decontaminate with clay to remove embedded grit that washing leaves behind.
- Optional but helpful: iron remover and tar remover if you have visible specks or road tar, follow product directions and don’t let chemicals dry on paint.
- Paint correction (situational): if the paint has obvious swirls or haze, a light polish can improve clarity under film. If you’re not comfortable polishing, you can skip it, just know the film won’t hide defects.
- Final wipe with an IPA mix to remove oils, then do a last visual inspection under strong light.
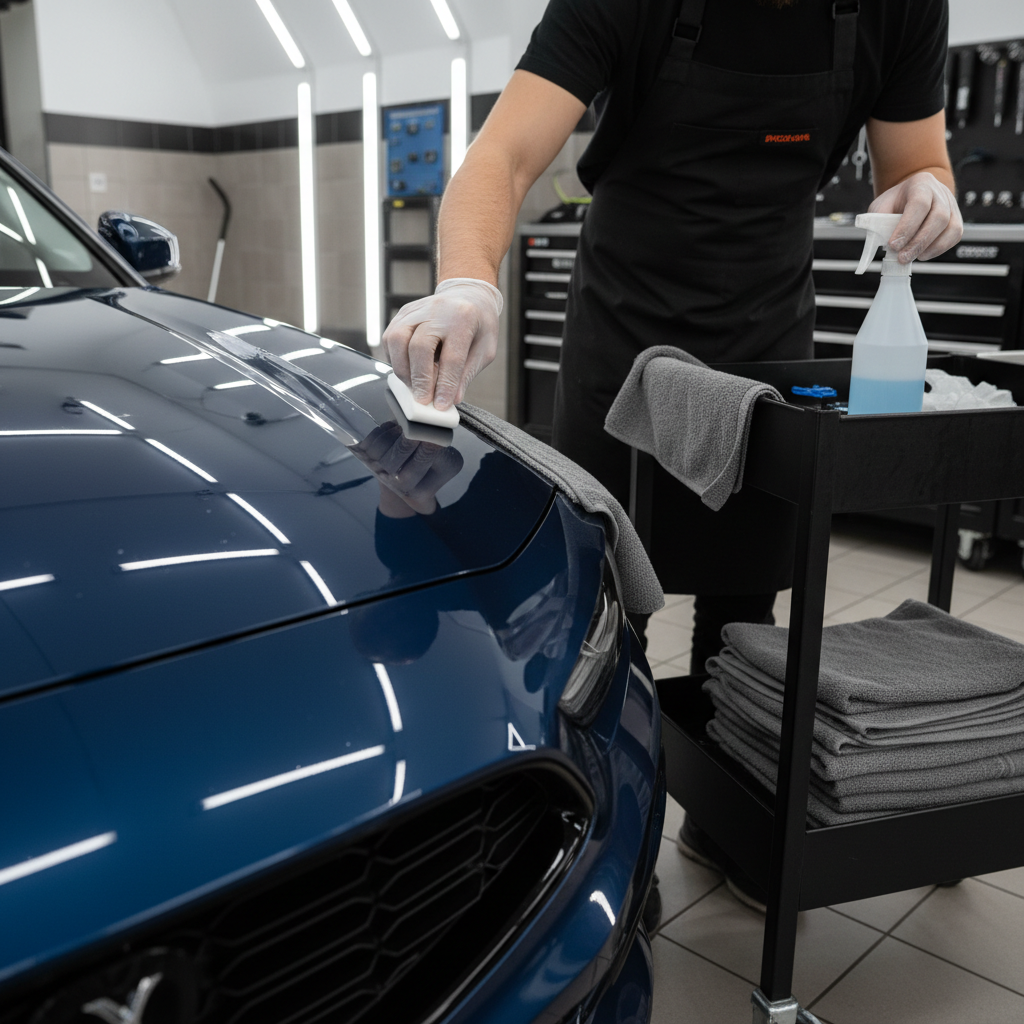
Edge prep deserves its own callout: wipe panel edges, seams, and around badges carefully. Most edge lift starts with invisible grime sitting right where you need adhesion most.
Mixing slip vs tack solution (and why you need both)
Slip solution lets the film float so you can position it. Tack solution increases grab when you’re ready to lock an area down. If everything is slip, the film wanders. If everything is tack, you trap fingers and stress marks.
- Slip solution: clean water plus a small amount of baby shampoo or a dedicated PPF slip concentrate, you want lubricity, not foam.
- Tack solution: clean water plus a little more alcohol or a dedicated tack mix, used sparingly on edges and anchor points.
Different film brands can react differently, so test on a small area, if the film feels “grabby” immediately, reduce tack strength, if it slides forever and won’t set, add a bit more tack where you anchor.
Step-by-step: applying PPF on a simple panel at home
This flow works well for a hood section, fender, door, or rocker piece. For a first attempt, pick a flat-ish piece that doesn’t require aggressive stretching.
1) Wet the panel and your fingers
Spray slip solution on the panel and on your fingertips before touching adhesive. Dry fingers can leave marks or drag contamination.
2) Peel the liner and keep the adhesive wet
As you peel, spray slip solution onto the adhesive side so it stays controllable. If the adhesive touches itself dry, it can crease and permanently mark.
3) Position the film using reference points
Line up one or two obvious landmarks, panel edges, body lines, washer nozzles, then lightly “float” the film into place. Don’t chase perfection while the piece is still shifting.
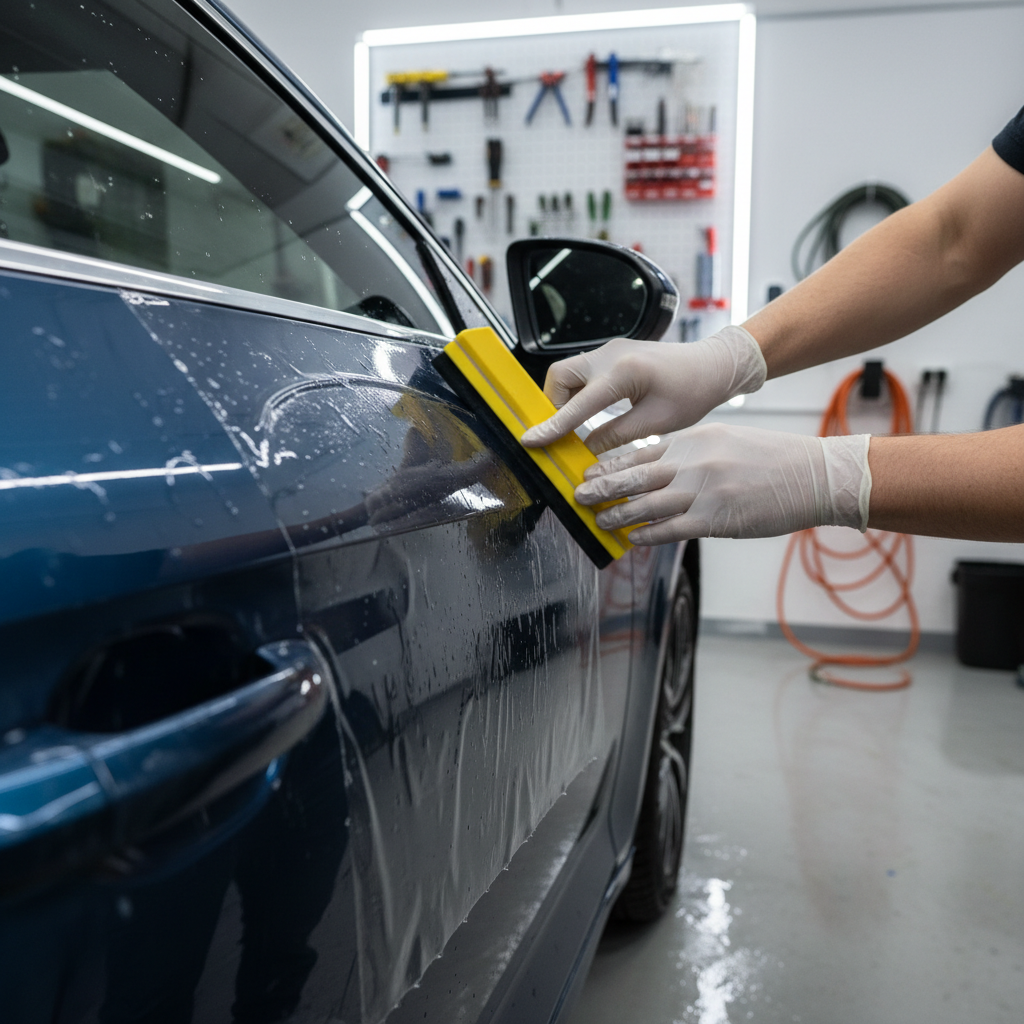
4) Create an anchor, then squeegee out from it
Pick a center area, spray a small amount of tack on the paint under that spot, lay the film, then squeegee firmly to lock the anchor. After that, push water out in overlapping strokes.
- Work from center to edges
- Use steady pressure, not fast swipes
- Keep the top surface wet so the squeegee glides without marring
5) Manage fingers and tension early
If you see a “finger” ridge near an edge, stop and reset that section before it dries. Light heat can help relax it, but too much heat plus pulling can overstretch film and cause future lift.
6) Set edges last with tack and pressure
When the main area is flat, lightly lift the edge, mist tack under it, then squeegee and hold pressure. Don’t flood edges with solution and expect them to stick.
After you finish a panel, leave it alone. Poking at small moisture pockets too aggressively can distort the film. Many small “water bubbles” dissipate as the moisture evaporates, while true air bubbles usually stay.
Troubleshooting: bubbles, haze, edge lift, and contamination
DIY PPF problems are common, and most have a fix if you catch them early.
- Milky haze: often moisture trapped under film, it may clear over days. If it looks like a sharp white line along a squeegee path, it can be stretch stress.
- Air bubbles: usually from not squeegeeing thoroughly from an anchor point. Small ones can sometimes be worked to an edge while the film is still wet.
- “Silvering” texture: tiny micro-bubbles in adhesive, often from low pressure squeegee work or film repositioning too many times.
- Edge lift: commonly contamination, too much stretch, or too much slip at the edge. Re-clean edges with IPA, use tack sparingly, then apply firm pressure.
- Dirt speck trapped: if you can lift that section early and rinse with slip, do it. If it’s already setting, you may need to live with it rather than tearing the film.
According to 3M... installers should follow the film manufacturer’s application guidance for wet installation, pressure, and post-install curing, because adhesive systems and top coats can vary by product line.
DIY decision: which panels are worth doing yourself?
Not every panel has the same difficulty. If your goal is a clean daily-driver result, start smart and build confidence.
| Panel | DIY Difficulty | Why | Recommendation |
|---|---|---|---|
| Hood (flat/partial) | Low to Medium | Large area but predictable shape | Great first big panel with a precut kit |
| Fenders | Medium | Curves near wheel arch | Doable, go slow on edges |
| Mirrors | Medium to High | Tight curves, stretch control | Try after you’ve done a flat panel |
| Front bumper | High | Complex curves, vents, seams | Often better left to a shop |
| Door cups/rockers | Low | Small pieces, forgiving | Best “starter win” for beginners |
If your first project is a full bumper, you might finish it, but you also might burn a lot of film learning what “controlled stretch” feels like.
Key takeaways and a realistic next step
Key takeaways: Prep beats technique, slip and tack need different jobs, and edges decide whether your install looks good a month later. If you want to practice how to apply paint protection film on car without wasting a whole hood kit, start with door cups or a small rocker piece, then move up.
Your next step is simple: pick one easy panel, gather the right tools, and commit to doing it slowly in a clean indoor space, you’ll learn more in one careful install than from ten highlight-reel videos.